
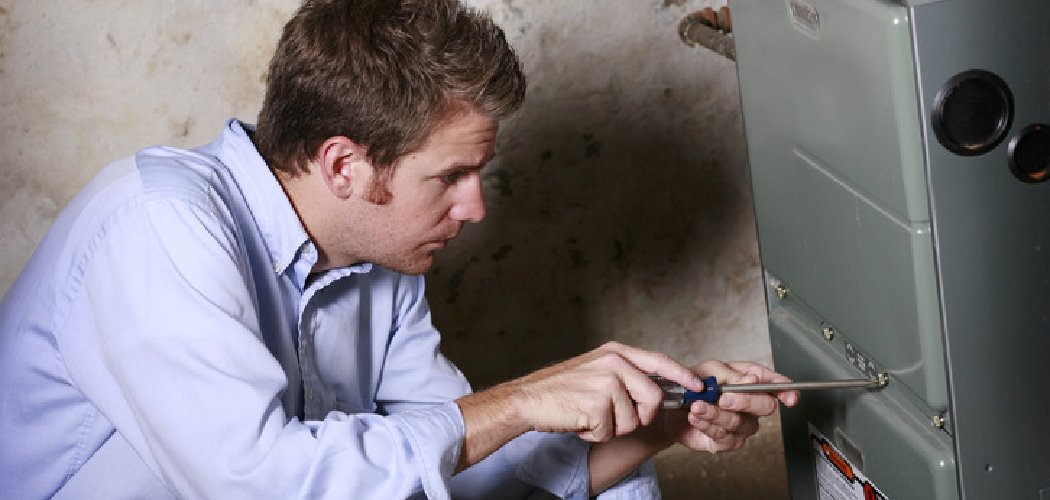

The furnace won’t stay lit, so you reach for the household glass cleaner and give the pilot assembly a good spritz — and now you’ve coated the thermocouple in a film that guarantees it never works right again. That spray-first instinct is the single most common way people turn a two-dollar fix into a service call. A pilot light that keeps dying is almost never broken; it’s usually just choked with dust and grime.
Learning how to clean furnace pilot light components is one of the few furnace jobs a homeowner can safely handle with the gas off. The pilot flame, the tiny nozzle behind it, and the thermocouple sitting in the flame all collect debris over a season. Clear that gunk out correctly and your furnace fires up like it did the day it was installed.
What You’ll Need
Set everything out before you shut the gas off, because you don’t want to leave a disassembled pilot while you dig through a drawer:
- Fine-grit emery cloth or 400-grit sandpaper
- A stiff-bristled toothbrush or small nylon brush
- Compressed air (canned duster) or a small hand pump
- A thin sewing needle or fine wire (for the pilot orifice)
- Cotton swabs
- Isopropyl alcohol (90% or higher)
- A screwdriver and small wrench set
- A flashlight or headlamp
- Work gloves and safety goggles
- A dust mask
- A long-reach butane lighter or fireplace matches
- A clean rag
Shut Off the Gas and Let It Cool

Turn the furnace off at the thermostat, then find the gas control valve on the unit and switch it to “OFF.” Give it a full five minutes so any residual gas clears out of the chamber before you go near it.
The burner area also holds heat longer than you’d think. Wait until the metal around the pilot is cool to the touch — testing with the back of your hand — before you start loosening anything. Rushing this step is how people burn their knuckles on a manifold that looked cold.
Locate the Pilot Assembly and Thermocouple
Shine your flashlight into the burner compartment and find the pilot burner — a small metal tube with a nozzle that points a flame at a thin copper rod. That rod is the thermocouple, and it’s the whole reason a dirty pilot causes trouble.
When the flame heats the thermocouple, it tells the gas valve “the pilot is lit, keep the gas flowing.” Coat that rod in soot or dust and it can’t sense the heat properly, so the valve shuts the gas down as a safety measure. Clients used to swear their valve was defective when nine times out of ten it was just a grimy thermocouple doing exactly what it was designed to do.
Brush Away Loose Dust and Debris
Start dry. Use the stiff toothbrush to knock loose the dust, cobwebs, and burner debris around the pilot assembly. Work gently — the components are light-gauge metal and the gas tube can bend.
Follow the brushing with a burst of compressed air to blow the loosened dust out of the compartment rather than letting it resettle on the burners. Hold the can upright and use short bursts so you don’t spray propellant liquid onto the parts.
Clear the Pilot Orifice
The pilot orifice is the tiny hole the gas flows through, and a single speck of debris in it will give you a weak, flickering flame that can’t hold. This is where that flickering-flame problem usually hides.
Slide your thin needle or fine wire straight into the orifice opening and gently work it back and forth to clear any blockage. Don’t ream it or force it wider — you only want to dislodge dirt, not enlarge the hole. Blow it out with compressed air when you’re done.
Polish the Thermocouple Tip
Here’s the part that fixes most “won’t stay lit” complaints. Rub the tip of the thermocouple with fine emery cloth or 400-grit sandpaper to remove the dark oxidation and soot film.
You’re aiming for a clean, slightly shiny surface — not a mirror polish, just enough to strip the buildup. Finish by wiping the rod with a cotton swab dipped in isopropyl alcohol to lift off any fingerprint oils or fine grit. Let it dry completely before you relight.
Relight and Test the Flame
Switch the gas valve to “PILOT,” press and hold the reset knob, and light the pilot with your long-reach lighter. Keep the knob held down for about 30 seconds so the freshly cleaned thermocouple heats up and takes over.
Release the knob. A healthy pilot flame is steady, blue, and cups the top inch of the thermocouple. If it’s yellow, weak, or lifting off the burner, shut down and recheck the orifice — that color usually means it’s still partially blocked.
Method Comparison: What to Use vs. What to Avoid
Matching the right tool to each part keeps you from causing the exact damage you’re trying to prevent. Here’s what actually belongs near a pilot assembly and what doesn’t.
| Task | Use This | Avoid This | Why |
| Loosening dust | Dry toothbrush + compressed air | Liquid sprays | Sprays leave film and residue |
| Cleaning thermocouple | Fine emery cloth, dry | Steel wool | Steel wool sheds fibers that short the sensor |
| Clearing the orifice | Thin needle or fine wire | Toothpick or drill bit | Wood breaks off inside; bits widen the hole |
| Wiping residue | Cotton swab + isopropyl alcohol | Glass cleaner | Ammonia film interferes with heat sensing |
| Drying parts | Air dry fully | Torch or heat gun | Direct heat warps light-gauge metal |
Stick to dry methods wherever you can. The only liquid that belongs in this job is high-percentage isopropyl alcohol, and only because it flashes off clean without leaving a residue.
Common Mistakes to Avoid
These are the errors that turned a simple cleaning into a repair bill:
- Spraying liquid cleaner on the assembly. It films the thermocouple and gums the orifice. Keep it dry.
- Using steel wool on the thermocouple. Loose metal fibers bridge the sensor and cause misreads. Emery cloth only.
- Widening the pilot orifice. Forcing a needle or using a drill bit changes the gas flow and ruins the flame pattern permanently.
- Skipping the 30-second hold after relighting. Let go too soon and the thermocouple hasn’t warmed enough to hold the valve open — you’ll think the cleaning failed.
- Working with the gas still on. Always switch the valve off and wait before touching anything.
- Ignoring a stubborn yellow flame. A flame that won’t turn blue after cleaning points to a deeper issue that needs a technician.
Safety and Warnings
You’re working around natural gas and hot metal, so treat this job with real caution.
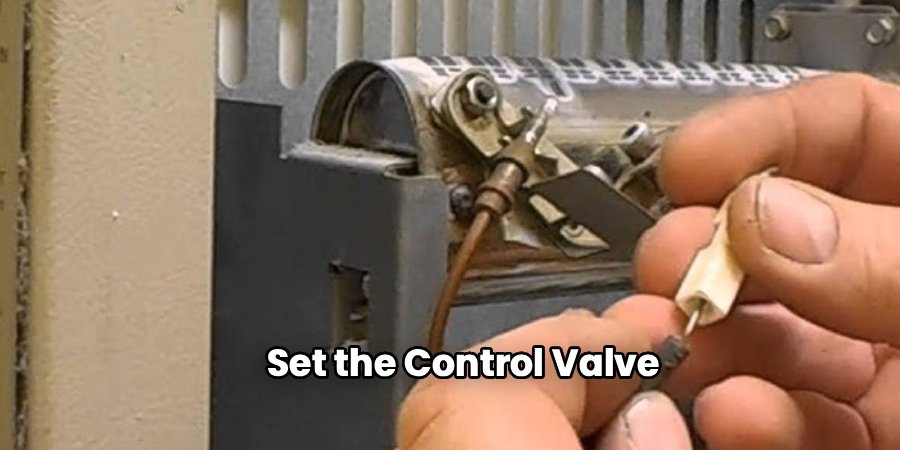
Shut the gas off and wait. Set the control valve to “OFF” and give it five full minutes before you go near the burner. Never disassemble anything with the gas flowing.
Ventilate the space. Open a nearby window or door and keep the area breathing while you work. If you smell gas at any point — that rotten-egg odor — stop, leave, and call your gas utility from outside. Do not flip switches or light anything.
Wear basic PPE. Goggles protect your eyes from dust bursts and emery grit, and a mask keeps you from breathing the fine soot you’ll stir up. Gloves guard against sharp burner edges.
Never use an open flame to inspect. Use your flashlight to look, and only introduce a flame when you’re deliberately relighting the pilot.
Know when to stop. If the flame won’t hold after a proper cleaning, if you smell gas repeatedly, or if the valve itself feels loose, shut everything down and bring in a licensed technician. Gas work has a low margin for error.
Maintenance and Prevention Tips
A clean pilot stays reliable with a few habits that most people skip:
- Vacuum the burner compartment every fall before heating season. Dust that settles over a dormant summer is the number-one cause of a weak pilot on the first cold night.
- Change your furnace filter on schedule. A dirty filter pulls extra dust through the system, and some of it ends up settling right on the pilot assembly.
- Keep the area around the furnace clear. Stored boxes, laundry lint, and pet hair all get drawn toward the combustion air intake.
- Check the flame color once a month during winter. A steady blue flame means you’re fine; any drift toward yellow is your early warning to clean again.
- Wipe the thermocouple during any burner cleaning. A ten-second rub with emery cloth prevents most mid-season shutdowns.
- Book a professional tune-up yearly. A tech checks the gas pressure and heat exchanger that a DIY cleaning can’t reach.
One seasonal note worth remembering: do this cleaning in early fall, not the middle of winter. A pilot assembly that sat idle all summer collects the most dust right before you need it, so clearing it before the first hard freeze saves you a cold night troubleshooting by flashlight.
Frequently Asked Questions
Why does my furnace pilot light keep going out?
A dirty thermocouple is the usual culprit. When soot coats the rod, it can’t sense the pilot flame’s heat, so the gas valve shuts down as a safety response. Polish the thermocouple tip with fine emery cloth and clear the pilot orifice, and it will typically hold again.
Can I clean a furnace pilot light myself?
Yes, as long as you shut off the gas, let everything cool, and stick to dry cleaning methods. Brush away dust, clear the orifice with a fine wire, and polish the thermocouple. Leave it to a licensed technician if you smell gas or the flame won’t stay lit after cleaning.
What does a healthy pilot flame look like?
It should be steady, mostly blue, and tall enough to wrap around the top inch of the thermocouple. A yellow, lazy, or flickering flame signals a blocked orifice or a dirty burner. Color is your quickest diagnostic — blue is good, yellow means clean it again.
Why is my pilot light yellow instead of blue?
Yellow means the flame isn’t getting enough clean gas and air, usually because the orifice is partially clogged with dust or debris. Clear the tiny opening with a fine needle and blow it out with compressed air. If it stays yellow, the gas-air mixture may need a professional adjustment.
How often should you clean a furnace pilot light?
Once a year is enough for most homes, timed for early fall before heating season starts. If you notice the flame drifting yellow or the pilot dropping out mid-winter, clean it again. A quick monthly flame-color check tells you whether it’s due.
Is it safe to relight a furnace pilot light on my own?
It’s safe if you follow the instructions on the furnace panel: set the valve to “PILOT,” hold the reset knob, light the flame, and keep holding for about 30 seconds. If you smell gas before lighting, stop and ventilate the area first. Never rush the relight or force the knob.
Final Word
A stubborn pilot light is almost always a cleaning problem, not a broken part, so grab the emery cloth before you grab the phone. Keep it dry, shut the gas off first, and give that thermocouple a good polish — most of the time, that’s all it takes.
