
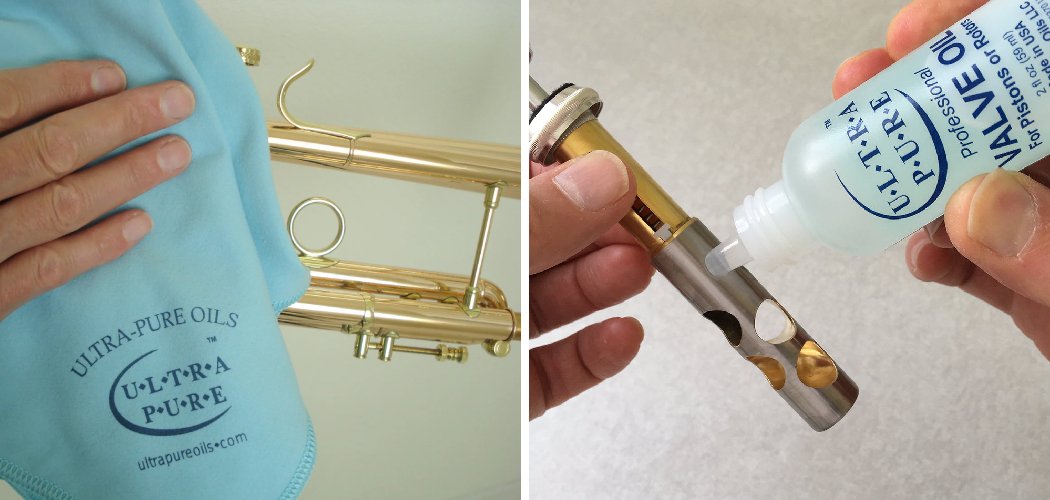
You grabbed the WD-40 off the garage shelf because the third valve was sticking, gave it a spritz, and for about a day it played like a dream. Then it gummed up worse than before, dragging like it was full of syrup. That’s the number one mistake I see: using the wrong lubricant, which strips the light valve oil and leaves a sticky film that grabs every speck of dust.
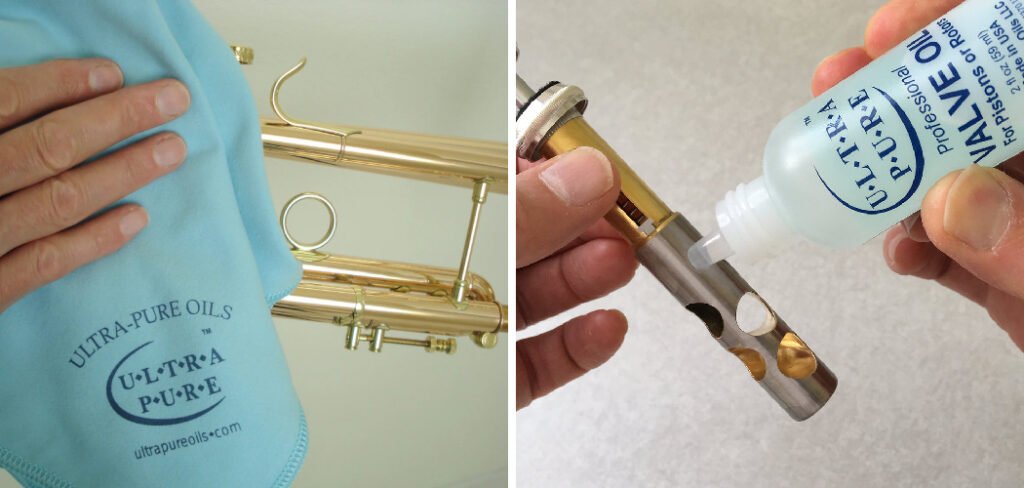
The good news is the fix is simple and cheap. Learning how to clean a trumpet valve properly takes about twenty minutes and a few supplies you probably already own. Do it right and those valves will move fast and silent, the way they did the day the horn left the shop.
What You’ll Need
- Valve oil (a proper trumpet-specific brand — this is not optional)
- A soft, lint-free cloth (microfiber works well)
- A valve casing brush (the long skinny one that came with your care kit)
- A soft cleaning snake or flexible brush
- Mild dish soap
- A large sink or plastic tub
- A soft towel to line the bottom of the sink
- Lukewarm water (never hot)
- Cotton swabs for tight spots
A small note from years of doing this: keep a dedicated cloth just for valves. A rag that’s touched furniture polish or degreaser will transfer residue onto the piston, and you’ll fight a mysterious stickiness for weeks before you figure out why.
Remove The Valves One At A Time
Unscrew the top valve cap and lift the piston straight up and out. Work with one valve at a time and keep the others in place.
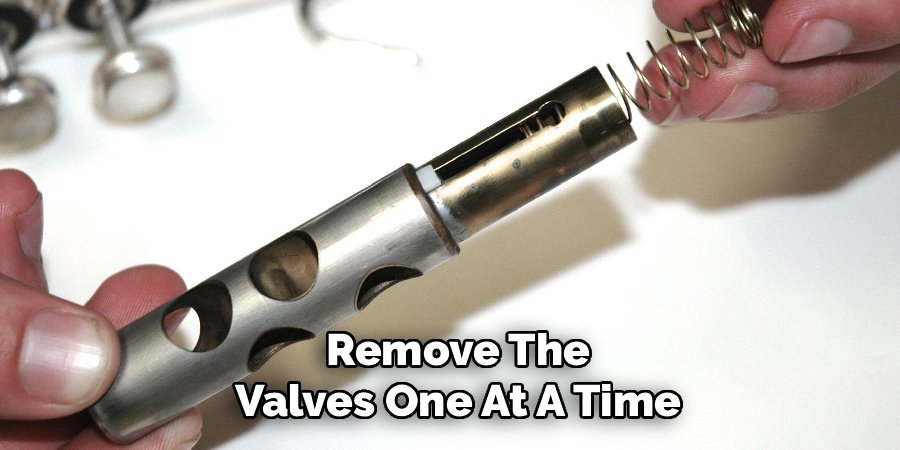
Here’s why that matters: each piston is numbered (usually 1, 2, 3 stamped near the top) and machined to fit only its own casing. Mix them up and none of them will seat properly. Lay each valve on your towel in order as you pull it, and you’ll never second-guess yourself.
Look at the piston as it comes out. You’ll often see a grimy ring of old oil and grime near the ports — that’s the stuff killing your action.
Wash The Piston Gently
Line the sink with a soft towel so a dropped piston lands soft instead of denting on porcelain. Fill the tub with lukewarm water and a small squirt of mild dish soap.
Dip the piston and wipe it down with your soft cloth, following the length of the metal, not scrubbing in circles. Use a cotton swab to clean around the ports (the holes in the piston) where buildup hides. Don’t force anything into the felt pads or the spring — keep those dry.
Rinse under cool running water and set the clean piston back on the towel to dry.
Swab Out The Valve Casing
While the piston dries, clean the empty casing it came from. Dip your casing brush in the soapy water and run it up and down inside the tube with gentle pressure.
Rotate the brush as you go to reach the full inner wall. You’re clearing out the same gunk that coated the piston — if you skip this, you’ll just re-coat the clean piston the second you drop it back in. Rinse the casing by running cool water through it, then let it drain.
Clean The Tubing And Slides Too
Since you’ve got the water running, this is a good moment to snake out the nearby tubing. Feed your cleaning snake through the slides and main pipe, working it back and forth until it comes out clean.

This step isn’t strictly part of the valve job, but valve gunk starts as tubing gunk that migrates. Clients used to ask me why their freshly oiled valves went sticky within days — nine times out of ten, dirty tubing was feeding grime straight back into the casing.
Dry Everything Before Reassembly
Water and oil don’t mix, and trapped moisture leads to that milky, streaky film on the piston. Wipe each piston dry with your lint-free cloth, then let all the parts air out for a few minutes.
Pay attention to the ports and the bottom of the casing where water pools. A quick pass with a dry cotton swab clears those spots.
Oil And Reinsert Each Valve
Now the part that actually keeps your valves moving. Hold the piston and apply three or four drops of valve oil down the length of the metal, then spread it with your fingers so the whole surface has a thin, even coat.
Slide the piston back into its matching casing. Before you tighten anything, rotate the piston until it clicks into place — the valve guide has to line up with its notch, or the horn won’t play a note. Once it drops and locks, screw the top cap back on snug, not cranked tight.
Press the valve a few times. It should snap down and spring back fast with a clean, quiet action.
What To Use vs. What To Avoid
| Task | Use This | Avoid This |
| Lubricating the piston | Trumpet valve oil | WD-40, 3-in-1 oil, cooking oil |
| Washing parts | Mild dish soap, lukewarm water | Hot water, harsh degreasers |
| Wiping the piston | Soft lint-free cloth | Paper towels, abrasive rags |
| Cleaning inside the casing | Soft casing brush | Metal wire, anything abrasive |
| Water temperature | Cool to lukewarm | Hot or boiling water |
| Polishing lacquer | Dry microfiber only | Metal polish, silver cleaner |
| Reaching ports | Cotton swabs | Toothpicks, pins, sharp tools |
| Drying | Air dry plus soft cloth | Heat gun, hair dryer |
Common Mistakes To Avoid
- Using the wrong oil. Household oils and penetrating sprays are too heavy. They gum up, attract dirt, and can eat at the lacquer over time. Stick to real valve oil.
- Hot water baths. Heat can loosen the lacquer finish and warp thin brass. Lukewarm is as warm as you should ever go.
- Mixing up the pistons. Each one fits a single casing. Put them back in the wrong order and the action jams or the horn won’t sound.
- Scrubbing with abrasives. Metal brushes, gritty pads, and paper towels leave micro-scratches that ruin the smooth seal between piston and casing.
- Skipping the drying step. Reassembling wet traps moisture, causes that milky film, and can start corrosion inside the casing.
- Over-tightening the caps. Cranking the top and bottom caps too hard strips threads and stresses the casing. Snug is enough.
Safety And Warnings
Cleaning a trumpet valve is low-risk for you personally — mild soap and water won’t hurt your skin or fill the room with fumes. The bigger danger is damaging the instrument, so a few cautions matter.
- Never use harsh chemical cleaners. Degreasers, oven cleaners, and industrial solvents strip lacquer and can pit the brass underneath. There’s no reason to bring them near the horn.
- Don’t mix cleaning products. Some people reach for bleach or ammonia-based sprays thinking stronger is better. Mixing these creates toxic fumes, and neither belongs on a trumpet in the first place. Plain dish soap does the job.
- Protect the finish. If your trumpet is silver-plated, keep silver polish away from the valves — it’s abrasive and leaves residue that gums the action. A dry cloth is all the polishing a valve needs.
- Watch the water temperature. Hot water is a real threat to lacquer and thin brass. Keep it cool to lukewarm every time.
- Handle springs and felts with care. These small parts are easy to lose or crush. Keep them dry and set them somewhere safe while you work.
How To Keep Your Trumpet Valves Clean Longer
A little routine care means you’ll rarely need a full teardown.
- Oil the valves weekly. A few drops on each piston keeps the action fast and stops grime from bonding to the metal. This is the single habit that saves the most trouble.
- Wipe your mouth before playing. Food particles and sugar from drinks travel down the horn and settle into the valves. A quick rinse of your mouth cuts buildup dramatically.
- Empty the water keys after every session. Standing moisture invites corrosion and that milky film.
- Do a full bath monthly. A complete wash every few weeks stops small buildup from becoming a sticky crisis.
- Store the horn in its case. Leaving it out on a stand collects dust that drifts straight into open casings.
- Keep it out of the car. Heat swings in a parked car stress the lacquer and thicken any oil inside. I’ve seen more warped slides from car trunks than from anything else.
- Handle valves by the stem, not the piston body. Skin oils and grit from your fingers transfer straight onto the working surface.
Frequently Asked Questions
How often should you clean a trumpet valve?
Oil the valves about once a week and give the whole valve section a full soap-and-water clean once a month. If you play daily or notice sticky action, clean more often. Regular light care beats fighting heavy buildup later.
Can you use rubbing alcohol to clean trumpet valves?
You can use a little rubbing alcohol on a cloth to cut through stubborn old oil residue, but don’t soak the piston in it and keep it off the lacquer. Follow up with a proper wash and fresh valve oil afterward. Most of the time, mild soap and water does everything you need without the risk.
Why do my trumpet valves stick after cleaning?
Usually it’s leftover moisture or the wrong lubricant. If you reassembled while parts were still damp, that film causes drag — dry everything fully next time. If you used a household oil instead of valve oil, strip it back off and re-oil properly.
What can I use if I don’t have valve oil?
Honestly, nothing household is a safe substitute. Sewing machine oil is sometimes suggested in a pinch, but it’s heavier and can gum up. A small bottle of valve oil is cheap and lasts months, so it’s worth keeping one on hand rather than risking damage.
How do I know if my valve casing is clean inside?
Run a clean casing brush or a dry swab through it and check what comes out. If the cloth stays clean and the piston drops smoothly with a quiet click, you’re done. Any grit or dark residue means one more pass with the brush.
Is it safe to put trumpet valves in water?
Yes, brief washing in cool to lukewarm soapy water is fine and recommended. Just keep the felt pads and springs dry, avoid hot water, and dry every part fully before reassembly. Never leave pistons soaking for long stretches.
Final Word
Skip the garage sprays, keep the water cool, and put each piston back in its own casing, and your valves will reward you with fast, quiet action for years. Oil them weekly and give them a proper bath once a month — that simple rhythm is the whole secret.
