
You spend a Saturday rolling on a fresh coat of sealer, step back to admire that wet-look shine — and there, frozen forever under the glaze, is the coffee ring from last summer and a faint green shadow of algae you thought you’d rinsed off. Sealer doesn’t hide dirt. It magnifies it and locks it in for years.

Learning how to clean pavers before sealing is the difference between a patio that looks brand new and one that looks worse than before you started. The prep work matters more than the sealing itself. Get the surface truly clean and fully dry, and the sealer bonds the way it’s supposed to.
What You’ll Need
- Stiff push broom
- Garden hose with an adjustable nozzle
- Pressure washer with a 25° fan tip
- Two buckets — one for solution, one for clean rinse
- Stiff-bristle nylon deck brush (pole version saves your back)
- Paver-safe cleaner or mild dish soap
- Oxygen bleach for algae, moss, and mildew
- Efflorescence remover or diluted white vinegar for white mineral haze
- Degreaser for oil and grease stains
- Rust remover made for concrete (if you have rust marks)
- Rubber gloves and safety glasses
- Drop cloth to shield garden beds
- Joint sand (in case cleaning exposes low joints)
- A stretch of dry, mild weather — this matters more than you’d think
Clear the Patio and Sweep It Down
Pull off every piece of furniture, planters, the grill, doormats — all of it. Anything left behind leaves a clean rectangle you’ll have to blend later, and it blocks the sealer from reaching those spots.
Sweep the whole surface with a stiff push broom to clear loose grit, leaves, and cobwebs. Get into the corners and along the house wall where debris piles up. Pull any weeds pushing through the joints while the surface is dry — they grip easier and come out cleaner than when everything’s wet.
Spot-Treat Stains Before the Full Wash
A general wash slides right past set-in stains, so hit them individually first. Give each treatment time to work rather than scrubbing at it dry.
Oil and Grease
Work a concrete degreaser into the spot with a brush and let it dwell ten to fifteen minutes. Grease sinks into the pores, so you may need two rounds on old driveway drips. Never seal over grease — the sealer won’t bond to it, and you’ll get a cloudy, peeling patch every time.
Algae, Moss, and Mildew
Mix oxygen bleach into warm water and brush it onto anything green or black. Let it foam and sit a few minutes. Oxygen bleach lifts organic growth without the color-stripping harshness of chlorine and won’t scorch your garden beds when it runs off.
Rust and Efflorescence
For rust from metal furniture or fertilizer, use a rust remover made for concrete — regular cleaners won’t touch it. For efflorescence, that chalky white haze that surfaces from within the paver, use an efflorescence remover or diluted vinegar. Here’s the field note that saves people a callback: efflorescence often keeps rising for weeks after heavy rain or new installation. Clients used to panic when it came back after cleaning. If yours is fresh, wait it out and let the mineral migration finish before you seal, or you’ll trap that haze right under the coat.

Deep-Clean the Whole Surface
With spots pre-treated, wash the entire patio so the color and texture come out even. Work in sections about four feet square so nothing dries before you rinse.
- Mist the pavers lightly with the hose so they don’t drink up your solution unevenly.
- Spread your cleaning solution — dish soap and warm water for routine grime, or oxygen bleach for a patio with real buildup.
- Let it dwell two to three minutes.
- Scrub the paver faces with your stiff nylon brush, working section by section.
- Rinse each section before moving on so cleaner never dries into a haze.
Pressure Wash and Rinse Clean
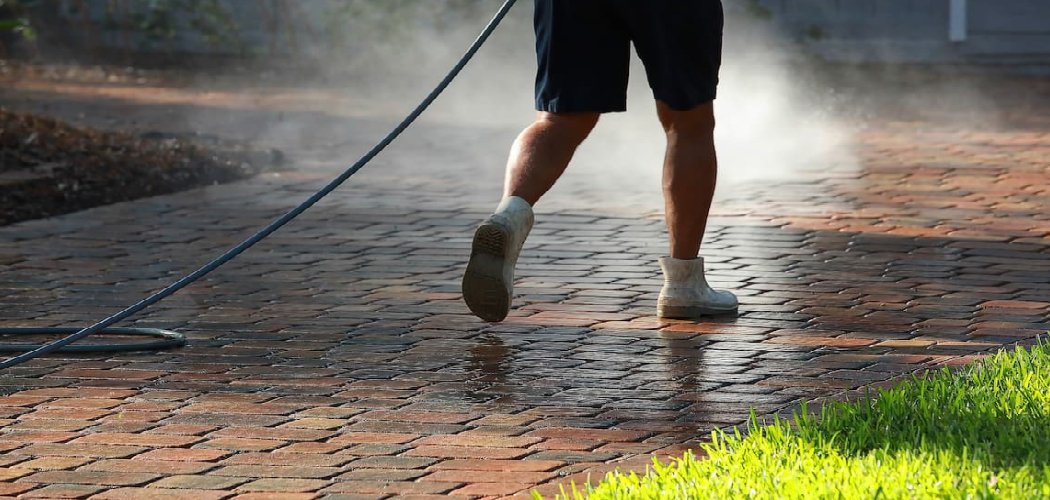
Run the pressure washer with a 25° fan tip, holding it about 12 inches above the surface at a shallow angle. Overlap your passes so you don’t leave clean-and-dirty stripes. If your pavers have joint sand you want to keep, ease off the pressure and stay back — a tight nozzle blows sand straight out of the gaps.
Rinse the whole patio one last time with the hose until the runoff comes clean. Any leftover cleaner residue will interfere with how the sealer bonds, so don’t rush this.
Let the Pavers Dry Completely
This is where impatience ruins the whole job. Pavers look dry on top long before they actually are — the moisture sits deep in the pores. Seal too soon and you trap that water, which shows up as a white, milky blush that’s a nightmare to fix.

Give the surface a minimum of 24 hours of dry weather, and 48 to 72 hours after pressure washing or heavy rain. Check the forecast before you start; you want a clear window on both sides of your sealing day. A quick test: tape a square of plastic to the surface for a couple of hours in the sun. If moisture beads under it, the pavers aren’t ready.
What to Use vs. What to Avoid
| Product / Method | Use It? | Why |
| Dish soap + water + nylon brush | ✅ Use | Safe on all pavers for routine grime |
| Oxygen bleach | ✅ Use | Lifts algae and mildew, color-safe, plant-friendly |
| Concrete degreaser | ✅ Use | Only thing that fully pulls oil from the pores |
| Efflorescence remover | ✅ Use | Clears mineral haze so it doesn’t get sealed in |
| Pressure washer, 25° tip, 12″+ back | ✅ Use | Even deep clean without gouging the surface |
| Diluted white vinegar (spot use) | ⚠️ Careful | Fine on light mineral spots, not as a main wash |
| Chlorine bleach | ❌ Avoid | Strips color, kills plants, leaves residue |
| Muriatic acid (undiluted) | ❌ Avoid | Etches pavers and weakens the surface |
| Pressure washer 0° / turbo tip | ❌ Avoid | Gouges paver faces and blasts out joint sand |
| Sealing over a damp surface | ❌ Avoid | Traps moisture, causes milky white blush |
Common Mistakes to Avoid
- Sealing over dirty pavers. Every stain you skip gets locked in permanently. Clean first, always.
- Not waiting long enough to dry. The number one cause of a hazy, blushed finish. Give it a full 24 to 72 hours.
- Leaving cleaner residue behind. Soap and chemical film block the sealer from bonding. Rinse until the water runs clear.
- Using chlorine bleach. It leaves a residue that interferes with sealing and scorches nearby plants.
- Ignoring efflorescence. Seal over that white haze and you’ve framed it for years.
- Forgetting to re-sand joints. If cleaning exposed low joints, refill and let the sand settle before you seal.
- Cleaning in full sun. Solution dries too fast to rinse evenly and leaves streaks.
Safety and Warnings
The rule that matters most: never mix cleaning products. Bleach and vinegar, bleach and ammonia, or bleach and any acid release toxic gas. Pick one product per job and rinse thoroughly before switching to another.
Wear rubber gloves and safety glasses with any cleaner stronger than dish soap — degreasers, rust removers, and oxygen bleach all irritate skin and eyes. When you move to sealing, read the product label: many sealers give off strong fumes, so work in open air and keep a solvent-based sealer well away from any flame or spark. Test both your cleaner and your sealer on a hidden paver first and wait to check for discoloration. Watch your footing throughout — wet pavers get slick, and a running pressure washer kicks back hard, so keep both hands on the wand and never aim it at anyone. Lay a drop cloth over garden beds so runoff doesn’t reach your plants.
Maintenance After You Seal
A sealed patio is far easier to keep clean, but the sealer only lasts if you look after it.
- Sweep weekly to clear grit before it grinds into the finish.
- Rinse with a low-pressure hose every couple of weeks, more often in shady, damp spots.
- Wipe spills quickly. Sealed pavers resist stains, but sitting oil or wine still finds a way in over time.
- Skip harsh chemicals. Stick to mild soap and water so you don’t break down the sealer early.
- Reseal every two to three years, or when water stops beading on the surface — that’s your signal the coat has worn thin.
- Treat shady, north-facing sections early each season, before algae takes hold in the damp.
Frequently Asked Questions
How long should pavers dry before sealing?
Give them at least 24 hours of dry weather for a light rinse, and 48 to 72 hours after pressure washing or heavy rain. Pavers hold moisture deep in the pores long after the surface looks dry. Tape a square of plastic to the surface for a couple of hours — if moisture beads underneath, they’re not ready yet.
Can you seal pavers without cleaning them first?
No — or rather, you shouldn’t. Sealer locks in whatever’s on the surface, so every stain, patch of algae, and streak of dirt gets frozen under the finish for years. Sealer also won’t bond properly to grease or residue, leaving cloudy, peeling patches. Cleaning first is the whole foundation of a good seal.
What is the best cleaner for pavers before sealing?
It depends on the mess. Warm water and dish soap handle routine grime; oxygen bleach lifts algae, moss, and mildew while staying color-safe. Use a concrete degreaser for oil and an efflorescence remover for white mineral haze. Steer clear of chlorine bleach and undiluted acid, which leave residue and damage the surface.
Do I need to pressure wash pavers before sealing?
Pressure washing gives the most even deep clean, especially on a patio with years of buildup. Use a 25° fan tip held about 12 inches back, never a 0° or turbo nozzle that gouges the surface and blows out joint sand. If your pavers are only lightly soiled, a good scrub and hose rinse can be enough.
Should you re-sand paver joints before sealing?
Yes, if cleaning dropped the sand below the paver surface. Sweep fresh joint sand into any low gaps, mist it lightly to settle, and let it dry before you seal. Sealing helps lock the sand in place, so full joints at this stage keep your pavers stable and block weeds.
Why do my pavers look white or hazy after sealing?
That milky blush almost always means you sealed over trapped moisture or existing efflorescence. The water or mineral haze got sealed under the coat with no way to escape. Prevent it by drying the pavers fully and clearing any white haze before you start — fixing it afterward usually means stripping the sealer and starting over.
Closing
The seal is only as good as the surface underneath it, so treat the cleaning and drying as the real job and the rolling-on as the easy part. Wait for that dry-weather window, rinse until the water runs clear, and you’ll get a finish that actually earns those two or three years.
