

The door above the stove has a sticky, yellowed haze that catches the light, so you reach for the heavy-duty degreaser under the sink and scrub hard with a scratchy pad. The grease lifts — and so does the sheen, leaving a dull, blotchy patch that no wiping brings back. That’s the fastest way people wreck good cabinets, because they attack the finish instead of the film sitting on top of it.
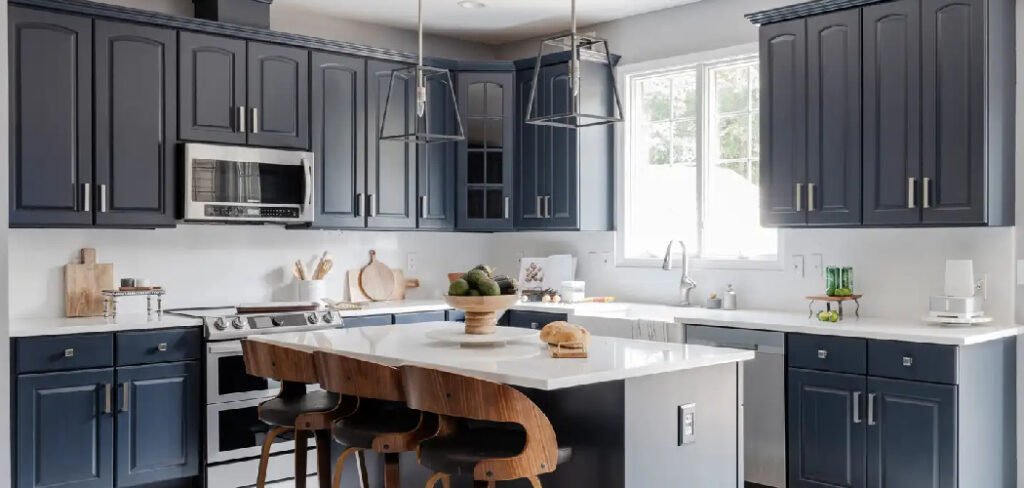
Learning how to clean painted kitchen cabinets without removing finish comes down to one idea: dissolve the grime, don’t grind it off. The right cleaner does the lifting so your cloth barely has to work. Get that balance right and greasy, fingerprinted cabinets look freshly painted again in under half an hour.
What You’ll Need
- Two or three soft microfiber cloths
- A non-abrasive sponge (skip the scrubby side entirely)
- Mild dish soap
- Warm water
- A small bucket or bowl
- White vinegar (for grease-cutting on durable finishes)
- Baking soda for spot-treating stubborn marks
- An old soft toothbrush for grooves and corners
- Cotton swabs for hinges and detailed trim
- A dry duster or vacuum brush attachment
Leave the melamine erasers, scouring pads, and industrial degreasers out of this job. They pull dirt off, but they take the paint’s sheen with them.
Dry-Dust the Cabinets First
Wipe every door and drawer front with a dry microfiber cloth or a vacuum brush attachment before anything gets wet. Painted cabinets collect a fine layer of kitchen dust that mixes with airborne cooking oil, and if you add water straight onto that, you turn it into a gritty smear that scratches as you wipe.
Work top to bottom so loosened dust falls onto surfaces you haven’t cleaned yet. Pay attention to the top edges of upper cabinets and the raised trim on shaker doors — those ledges hoard grime everyone forgets about.
Mix a Gentle Cleaning Solution
Fill your bucket with warm water and add just a few drops of mild dish soap. You want it barely sudsy — not a foamy sink of bubbles. Too much soap dries into a sticky film that streaks and actually grabs more dust later.
Dish soap is built to cut grease, which is exactly what most cabinet grime is. For heavier buildup near the stove, keep a small bowl of half water, half white vinegar on hand as a booster. Skip vinegar on chalk-painted or specialty matte cabinets, though — the acid can dull those finishes.
Wash the Doors from the Bottom Up
Wring your sponge until it’s damp, not dripping, then wipe each door starting at the bottom and working upward. Cleaning top-first lets dirty water run down over dry paint and set into streaks that are a pain to remove. Washing upward means drips land on an area you’re about to clean anyway.
Wipe in the direction of the wood grain or brush strokes using light, even pressure. Let the soap sit for ten or fifteen seconds on greasy spots so it can break the film down — that soak time does far more than muscle.
Handle the Upper Cabinets Near the Stove
Here’s the detail most guides miss: grease behaves differently depending on where the cabinet sits. Uppers beside and above the range collect airborne oil that heat bakes into a hard, amber varnish over months — it won’t wipe off like a fresh fingerprint. Lower cabinets mostly catch hand oils, splashes, and shoe scuffs, which lift far more easily.
For those baked-on upper doors, apply your soapy solution, wait a full minute, then reach for the vinegar booster if it’s still tacky. Warm water genuinely works better here than cold, since mild heat softens hardened grease. I used to tell clients to wash the over-stove cabinets last, after the room had warmed up from a bit of cooking or a kettle — the grease gives way easier when it’s not stone cold.

Clean the Grooves, Corners, and Hardware
Shaker and raised-panel doors trap grime in their seams. Dip a soft toothbrush in your soapy water and work it gently along the grooves, then use a cotton swab in the tight inside corners where the panel meets the frame.
Go easy around the edges — inside corners often have thinner paint coverage and chip more readily than the flat faces. For handles and pulls, a cotton swab lifts the buildup that collects right where fingers grab.
Spot-Treat Stubborn Marks
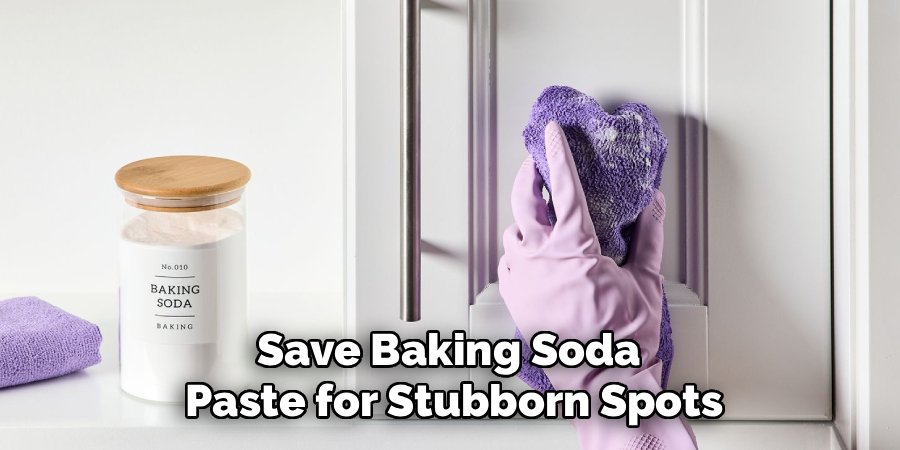
For scuffs, dried splatters, or sticky residue that soap won’t budge, make a paste of baking soda and a little water. Dab it directly on the mark and rub in small circles with almost no pressure. Baking soda is a mild abrasive, so keep it on the spot itself — never scrub it across the whole door.
Wipe it off with a clean damp cloth the moment the mark lifts. Left to dry, baking soda leaves a chalky film that’s more annoying than the stain you started with.
Rinse and Dry Every Surface
Go over each door and drawer front with a clean cloth wrung out in plain warm water to lift any soap or vinegar residue. Change your rinse water once it looks cloudy. Then dry immediately with a fresh microfiber cloth.
Never let painted cabinets air-dry with water sitting on them. Standing droplets leave spots, and moisture that seeps into a seam or an unsealed edge can lift the paint over time — especially along the bottom rail near the dishwasher.
Safe vs. Unsafe Products and Methods
The cleaner and the tool matter more than how hard you scrub. This table is what separates a cabinet that stays looking painted from one that ends up patchy.
| Safe for Painted Cabinets | Avoid — Damages the Finish |
| Mild dish soap and warm water | Heavy-duty degreaser sprays |
| Diluted white vinegar (durable finishes) | Bleach or ammonia cleaners |
| Soft microfiber cloths | Abrasive scouring pads |
| Non-abrasive sponge | Melamine “magic eraser” pads |
| Baking soda paste, spot-only | Full-surface abrasive scrubbing |
| Soft toothbrush for grooves | Stiff-bristle or wire brushes |
| Light, even pressure | Hard scrubbing on one spot |
| Warm water to soften grease | Solvents, acetone, paint thinner |
Melamine erasers deserve a specific warning. They feel soft but they work like ultra-fine sandpaper — they buff the sheen right off satin and matte paint and leave a permanent dull halo you can’t wipe back to life.
Common Mistakes to Avoid
- Skipping the dry-dust step. Adding water to greasy dust makes grit that scratches the paint. Dust first, every time.
- Reaching for strong degreasers. Industrial cleaners strip the finish along with the grease. Mild soap plus soak time handles most kitchen grime.
- Using abrasive pads or erasers. They leave dull patches that no cleaning fixes — only repainting does.
- Scrubbing one spot too hard. On satin and matte finishes this burnishes the surface shiny. Blot and lift instead of grinding.
- Overloading on soap. A heavy sudsy film dries streaky and attracts dust faster. Keep it barely soapy.
- Letting cabinets air-dry. Standing water spots the paint and can lift it at the seams. Dry by hand.
- Testing nothing first. Trying a new cleaner straight on a visible door is how you learn — too late — that it dulls the finish.
Safety and Warnings
Stick to soap and water and there’s little hazard here — this is mostly about protecting the finish, not your lungs. But a few precautions save you from an expensive mistake.
- Test in a hidden spot first. Try any cleaner, including vinegar or baking soda, on the inside edge of a door or a low corner before touching a visible area. Painted finishes vary, and some react badly.
- Never mix cleaners. Don’t combine bleach with ammonia or vinegar — some mixes release toxic gas. Use one product at a time and rinse between them.
- Skip harsh chemicals. Bleach, ammonia, and solvents can discolor paint, soften it, or strip the sheen. They’re overkill for cabinet grime anyway.
- Ventilate when using vinegar. It’s mild, but crack a window if the smell bothers you, especially in a closed-up kitchen.
- Go easy on baking soda. It works, but only in gentle, spot-specific dabs. Too much pressure sands the paint.
- Keep water out of the seams. Moisture wicking into a chip or unsealed edge can lift paint from underneath over time.
Maintenance and Prevention Tips
A little routine here means you rarely need a full wash, and the paint stays fresh for years:
- Wipe high-touch zones weekly. Handles, the area around the trash pull-out, and the doors either side of the stove collect the most oil. A ten-second damp wipe stops buildup before it hardens.
- Wipe splatters while they’re fresh. Grease and sauce lift with plain water the same day. Left for weeks, they need baking soda and real effort.
- Run the range hood while cooking. It pulls airborne oil away from your upper cabinets — the single biggest thing that slows down that baked-on haze.
- Dust monthly. A dry cloth over the tops and trim keeps grit from building up and scratching later.
- Mind the dishwasher cabinet. Steam escapes when you open it mid-cycle, so wipe the neighboring doors dry and don’t let moisture linger on the bottom rail.
- Touch up chips early. A tiny dab of matching paint on a chip stops water getting underneath and spreading the damage.
Frequently Asked Questions
What is the best cleaner for painted kitchen cabinets?
Warm water with a few drops of mild dish soap handles nearly everything, since dish soap is designed to cut the grease that makes up most cabinet grime. For heavier baked-on buildup near the stove, add diluted white vinegar as a booster on durable finishes. Save baking soda paste for stubborn spots, and stay away from strong degreasers and abrasive pads.
Can you use vinegar on painted cabinets?
Yes, diluted with water, on durable satin and semi-gloss finishes where it helps cut grease. Keep it off chalk paint, matte, and specialty finishes, since the acid can dull them. Always test it on a hidden corner before wiping a visible door.
How do you get grease off cabinets without ruining the paint?
Apply mild soapy water, let it soak for up to a minute so it breaks the grease down, then wipe gently with a soft cloth. Warm water works better than cold because it softens hardened grease. For baked-on film near the stove, follow with a little diluted vinegar — never a scouring pad or heavy degreaser.
Why do my cabinets look dull after cleaning?
You most likely scrubbed too hard or used an abrasive pad or eraser, which buffed the sheen off — especially easy to do on satin and matte finishes. Leftover soap film can also look dull, though that wipes away with a clean damp cloth. A genuinely burnished spot, unfortunately, usually needs repainting.
How often should you clean painted kitchen cabinets?
Wipe high-touch areas and the doors near the stove weekly, and dust the whole run monthly. A full wash every couple of months keeps most kitchens in good shape, though heavy cooking means the upper cabinets around the range need more frequent attention.
Can you use a magic eraser on painted cabinets?
Better not to. Melamine erasers act like ultra-fine sandpaper and will strip the sheen, leaving a permanent dull patch on satin and matte paint. Stick to a soft cloth or non-abrasive sponge, and reserve baking soda for the occasional stubborn mark.
Match your cleaner to the grease and let it do the lifting instead of your arm, dust before you wet anything, and always dry by hand. Do that and your cabinets stay looking freshly painted without ever risking the finish underneath.
