

You wheel your bike out after a long ride, grab the pressure washer, and blast it head-on to knock off the bug guts and road film. Two weeks later the chrome is spotted with tiny rust freckles, the speedo has fog trapped inside it, and one of the switch housings feels sticky. That’s not bad luck — high-pressure water and the wrong cleaner do more damage to a Harley than a whole season of riding ever will.

Learning how to clean a Harley Davidson properly means working with the metals and finishes instead of fighting them. Chrome, powder-coated frames, raw aluminum fins, and leather each want a different touch. Get the order and the products right, and you’ll pull a mirror shine off the tank without a single water spot or pitted bolt.
What You’ll Need
- Two buckets (one wash, one rinse) with grit guards if you have them
- pH-neutral motorcycle or automotive wash soap
- A soft wash mitt and a couple of microfiber wash pads
- A stack of clean microfiber drying towels
- Detailing brushes in a few sizes (plus an old toothbrush)
- Dedicated chrome polish and a separate metal polish for aluminum
- Non-acidic wheel and tire cleaner
- Bug-and-tar remover
- Leather cleaner and conditioner for the seat
- Spray detailer or quick wax for touch-ups
- Carnauba wax or a paint sealant for painted panels
- A hose with a gentle spray nozzle — not a pressure washer
- A leaf blower or compressed air for drying crevices (optional but worth it)
- Nitrile gloves and a pair of knee pads
Let the Bike Cool Down First
Never wash a hot Harley. Cold water hitting a hot engine, exhaust, or brake rotor can warp metal and flash-dry cleaner into ugly streaks you’ll fight for an hour. Let the bike sit for at least 30 to 45 minutes after a ride until the pipes and jugs are cool to the touch.
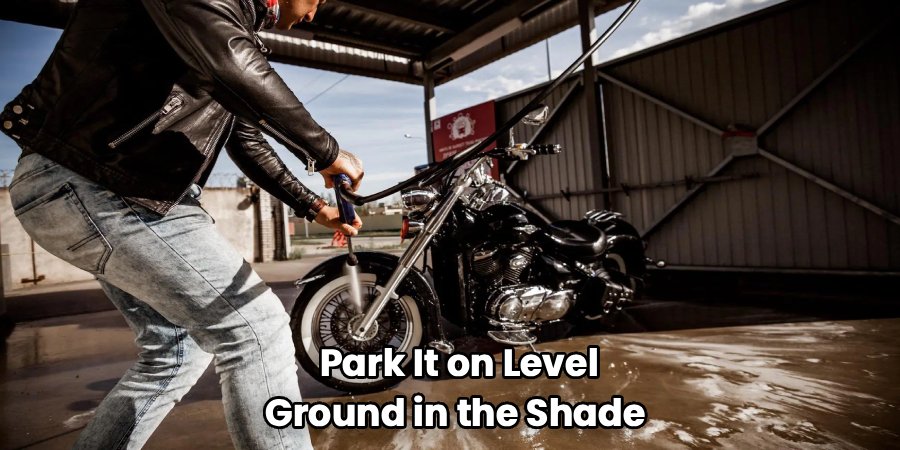
Park it on level ground in the shade — direct sun bakes soap onto the surface before you can rinse it. If your bike has any exposed connectors, air intake, or an open filter, cover them loosely with a plastic bag so no water sneaks in.
Rinse and Pre-Soak the Grime
Give the whole bike a gentle rinse from top to bottom to float off loose dirt before your mitt ever touches it. Skip the pressure washer entirely; a light hose stream or even a bucket pour clears road film without driving water into the wheel bearings, switch housings, or instrument seals.
Hit the buggy spots — the front fender, forks, and headlight — with a bug-and-tar remover and let it dwell. Dried insects are acidic, and I’ve seen them etch clear coat on a neglected fender within a single hot summer if they sit long enough. That dwell time softens them so you’re wiping, not scrubbing.
Wash the Painted Body Panels
Fill one bucket with your pH-neutral soap solution and keep the second full of clean water for rinsing your mitt. Work top down — tank, fenders, side covers — using straight strokes rather than circles so any fine scratches stay invisible in the light.
Rinse your mitt in the clean-water bucket every few passes so you’re not grinding grit back into the paint. Harley’s deep candy and metallic paints show swirl marks fast, so the two-bucket habit isn’t optional if you care about that finish.
Reach the Tight Spots With Brushes
Detailing brushes get into the places a mitt can’t — around the fuel cap, behind the mirrors, under the seat lip, and along the frame welds. Dip a soft brush in your soap solution and work gently, then rinse the loosened dirt away before it dries.
Clean the Chrome Without Scratching It
Chrome is where most people wreck a good wash. Wash it first with plain soapy water and a soft mitt to lift abrasive grit, because polishing over embedded dirt drags it straight across the surface and leaves fine scratches.
Once the chrome is clean and dry, apply a dedicated chrome polish with a soft cloth in small sections, let it haze, then buff it off with a fresh microfiber towel. Never use an aluminum or “all-metal” polish on chrome — the abrasives are too aggressive and dull the plating over time.
Tackle the Engine Fins and Aluminum
Raw and polished aluminum fins trap baked-on dust and oil mist. Use a detailing brush with your soap solution to work between each fin, then rinse and dry thoroughly, since aluminum water-spots almost instantly.
For dull or oxidized aluminum, a proper aluminum polish brings back the shine — but keep it strictly off the chrome and painted areas. Work one small zone at a time so the polish doesn’t dry into the fins where you can’t reach it.
Care for the Exhaust Pipes
Cool pipes only — this is worth repeating. Wash the exhaust with soapy water first, then treat chrome pipes exactly like the rest of your chrome with a gentle chrome polish.
Light heat discoloration (that blue-gold tint near the header) can sometimes be reduced with a chrome-safe polish and patience, but deep bluing is baked into the metal and won’t buff out. Don’t attack it with abrasives hoping it’ll vanish — you’ll only scratch the finish.
Clean and Condition the Leather Seat
Wipe the seat down with a barely-damp cloth first to lift surface dust. Apply a leather cleaner to a microfiber towel — not directly to the seat — and work it in gently, then wipe away the residue.
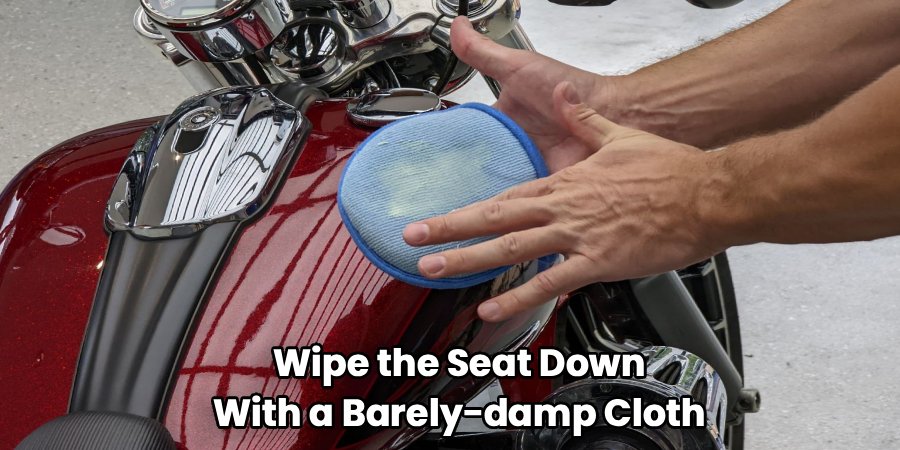
Once it’s dry, follow with a leather conditioner to keep the seat supple and guard against cracking from sun and sweat. Skip household wipes and all-purpose sprays here; they strip the natural oils and leave leather brittle within a season or two.
Clean the Wheels and Tires Last
Wheels carry the heaviest brake dust and road grime, so save them for the end with their own brush and mitt. Use a non-acidic wheel cleaner — acidic formulas eat into chrome and clear-coated rims — and agitate with a soft wheel brush before rinsing.
Dress the tire sidewalls with a matte tire product if you like, but keep it off the tread and off the brake rotors. Slick rotors are a real safety problem on the first ride out.
Dry It Right to Beat Water Spots
Air-drying is how you end up with spots all over that fresh chrome. Blot and wipe every surface with clean microfiber towels, working top to bottom.
A leaf blower or compressed air pushes water out of the seams, fin gaps, switch housings, and around the instruments where towels can’t reach. Then take the bike for a short, slow ride to shake out any hidden water before it settles into crevices and causes corrosion.
Do This vs. Avoid This
| Task | Do This | Avoid This |
| Rinsing | Gentle hose stream | Pressure washer up close |
| Timing | Wash a cool bike in the shade | Washing hot pipes or in direct sun |
| Painted panels | pH-neutral soap, straight strokes | Dish soap or circular scrubbing |
| Chrome | Dedicated chrome polish | Aggressive all-metal polish |
| Aluminum fins | Aluminum polish, kept off chrome | One polish for every metal |
| Leather seat | Leather cleaner + conditioner | Household wipes or degreasers |
| Wheels | Non-acidic cleaner, separate brush | Acidic cleaner, shared mitt |
| Drying | Microfiber + blower | Letting it air-dry |
Common Mistakes to Avoid
- Pressure-washing the bike. High pressure forces water past seals into bearings, switches, and the instrument cluster. A regular hose cleans just as well without the damage.
- Washing while hot. Cold water on hot metal warps components and streaks cleaner. Let everything cool first.
- Using one polish for every metal. Chrome and aluminum need different products. Mixing them dulls the chrome fast.
- Skipping the wheels-last rule. Brake dust is abrasive; drag it into your body mitt and you’ll swirl the paint.
- Neglecting the leather. Cleaning without conditioning leaves the seat dry and cracked within a season.
- Air-drying chrome. Spots and streaks form almost instantly on plated surfaces. Always towel and blow dry.
Safety and Warnings
The real hazards here are heat and chemicals, not the soap. Let the exhaust, engine, and brake rotors fully cool before washing — cool metal to the touch, every time — to avoid burns and warped parts.
Wear nitrile gloves when handling polishes, bug-and-tar remover, and wheel cleaners, since these solvents dry and irritate skin. Work in a well-ventilated area or outdoors so you’re not breathing polish and solvent fumes, and keep them away from open flames or hot surfaces. Never mix cleaning products together in a bucket — combining a wheel acid with other chemicals can release dangerous fumes.
Always test any new polish or cleaner in an inconspicuous spot first, especially on painted panels and leather. Keep tire dressing and any oily product off the brake rotors and tread; a slick tire or rotor is a crash waiting to happen. When you’re done, double-check that no covers or bags got left over an intake or connector before you start the engine.
Maintenance and Prevention Tips
Keeping a Harley clean is far easier when you stop grime from settling in the first place.
- Wipe it down after every ride. A quick pass with a spray detailer and microfiber towel lifts bugs and dust before they bond to the finish.
- Wax painted panels every few months. A coat of carnauba or sealant sheds water and dirt, so routine washes take half the effort.
- Reapply chrome polish seasonally. A protective layer keeps moisture off the plating and slows pitting, especially before winter storage.
- Condition the leather monthly. Regular conditioning beats trying to rescue a cracked seat later.
- Store it covered and dry. UV fades paint and dries leather; trapped moisture invites rust. A breathable cover in a dry space is ideal.
- Deal with bugs and bird droppings immediately. Both are acidic and etch clear coat fast if left in the sun.
- Keep the chain and drivetrain clean and lubed per your manual so grime doesn’t fling onto freshly cleaned wheels.
Frequently Asked Questions
Can you pressure wash a Harley Davidson?
You can, but you’re better off not aiming one at the bike up close. High pressure drives water past seals into wheel bearings, switch housings, and the instrument cluster, and it can strip lubrication from the chain and pivot points. A regular garden hose on a gentle setting rinses road film just fine. If you must use a pressure washer, keep it on low and hold it well back, away from electrical components and seals.
What soap should I use to wash a motorcycle?
Use a pH-neutral motorcycle or automotive wash soap. Dish soap strips wax and protective coatings and can dull both paint and chrome over time. A dedicated wash soap lifts grime while leaving your wax and sealant intact, which keeps the finish protected between washes.
How do I clean chrome on a Harley without scratching it?
Wash the chrome first with plain soapy water to remove abrasive grit, then dry it. Apply a dedicated chrome polish with a soft microfiber cloth in small sections, let it haze, and buff it off with a clean towel. Avoid aggressive all-metal or aluminum polishes on chrome — their abrasives dull the plating.
How do I get water spots off after washing?
Prevent them first by drying with microfiber towels and a blower instead of letting the bike air-dry. If spots have already formed, a spray detailer or quick wax and a fresh microfiber cloth lift most of them. For stubborn mineral spots on chrome, a light pass of chrome polish usually clears them.
How often should I clean my Harley?
A quick wipe-down after each ride keeps buildup from setting in, and a full wash every week or two suits most riders. If you ride through rain, salt, or heavy bug country, clean it sooner — road salt and insect acids damage finishes if they sit. Waxing every few months rounds out the routine.
Is it okay to wash a Harley when the engine is hot?
No. Cold water on a hot engine, exhaust, or brake rotor can warp metal and flash-dry cleaner into streaks. Let the bike cool for at least 30 to 45 minutes until the pipes and jugs are cool to the touch before you start.
Closing
Clean your Harley in zones — paint, chrome, aluminum, leather, then wheels — and match the product to each surface instead of blasting the whole bike at once. Keep the water pressure low, dry everything before spots can form, and a fast wipe-down after each ride will keep that shine with almost no effort.
