

Your pump is running, the motor sounds fine, but the water barely trickles back into the pool. Most people blame the filter, backwash it twice, and scratch their heads when nothing changes. Nine times out of ten, the real culprit is a wad of hair, leaves, and grit jammed inside the impeller.
That little spinning part does the heavy lifting, and when it clogs, your whole circulation system stalls. Knowing how to clean impeller in pool pump saves you a service call and keeps your water from turning green. It’s a 30-minute job you can absolutely do yourself.
What You’ll Need
- Flathead and Phillips screwdrivers
- A stiff piece of wire or a straightened coat hanger
- Needle-nose pliers
- A small bottle brush or old toothbrush
- Garden hose with a decent stream
- Bucket
- Silicone-based lubricant (for the O-ring)
- Clean rags
- Work gloves
- A flashlight or headlamp
- Replacement pump lid O-ring (keep one on hand, just in case)
You won’t need harsh chemicals for this. The impeller job is about physically removing debris, not dissolving it.
Shut Down and Cut the Power First
Before you touch anything, turn the pump off at the switch, then flip the breaker at the panel. This isn’t a step to rush. A pump that kicks on while your fingers are inside the housing can cause a nasty injury.
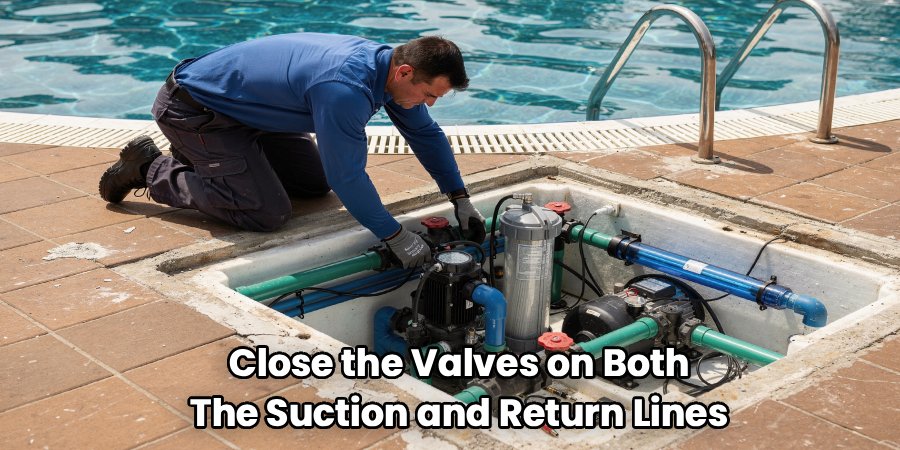
Once the power is dead, close the valves on both the suction and return lines. If your setup has them, this stops the pool from draining back through the open pump while you work. Give the system a minute to lose pressure before you open anything.
Open the Pump and Clear the Basket
Twist off the clear pump lid on top and lift out the strainer basket. This is where most of the big debris collects, and honestly, if you’ve let leaves pile up here for weeks, that’s how the impeller got clogged in the first place.
Dump the basket, rinse it with the hose, and check it for cracks. A split basket lets debris slip past and head straight for the impeller, which is exactly what you’re trying to avoid. Set it aside to dry while you get to the real work.
Reach the Impeller Housing
The impeller sits behind the basket, tucked inside the volute at the back of the pump housing. Shine your flashlight into the opening where the basket sat. You’ll see a small round port at the base with vanes inside, that’s the eye of the impeller.
Some pumps let you reach it right through the basket opening. Others require you to unbolt the motor assembly and pull it back from the housing. Check your pump manual for which type you have before you start unbolting things you don’t need to.
Pull the Motor Assembly If Needed
If you can’t reach the impeller through the front, remove the bolts holding the motor and seal plate to the pump housing. Set the bolts in your bucket so they don’t roll into the grass and vanish. Gently slide the motor assembly straight back, keeping it level, until the impeller clears the volute.
Take a photo with your phone before you pull anything apart. When it’s time to reassemble, you’ll thank yourself for having a reference of where every gasket and washer sat.
Clear Debris From the Impeller Vanes
Here’s the part that actually fixes your flow problem. Spin the impeller slowly by hand and look between the curved vanes. You’ll usually find hair wrapped tight around the center, plus small twigs, pebbles, or a mat of stringy gunk packed into the channels.
Work your straightened wire or coat hanger into each vane opening and drag the debris out. Follow up with the bottle brush or toothbrush to scrub the vane surfaces clean. Rinse everything with a steady hose stream, then check again with your flashlight. Even a small clog in one vane throws off the balance and cuts your flow.
Inspect, Lube, and Reassemble
With the impeller clear, look it over for cracks or chipped vanes. A damaged impeller won’t move water properly no matter how clean it is, and it’s a cheap part to replace. Check the shaft seal too while you have access.
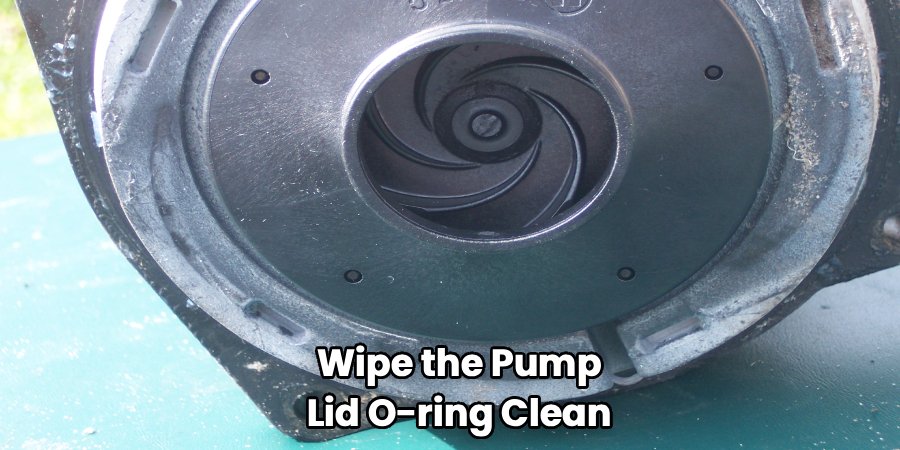
Wipe the pump lid O-ring clean, then coat it with a thin layer of silicone lubricant. Never use petroleum jelly here, it swells the rubber and ruins the seal within a season. I learned that one the hard way early on, watching a client’s brand-new O-ring turn to mush after someone greased it with the wrong stuff. Reassemble in reverse order, hand-tighten the lid, and open your valves back up before restoring power.
Do’s and Don’ts of Impeller Cleaning
| Do This | Don’t Do This |
| Cut power at the breaker first | Work with the pump only “switched off” |
| Use a wire or brush to clear vanes | Blast the impeller with a pressure washer |
| Lubricate the O-ring with silicone | Grease it with petroleum jelly |
| Photograph the assembly before removal | Guess at reassembly order |
| Replace a cracked impeller or basket | Run the pump with damaged parts |
| Empty the strainer basket weekly | Let debris pile up for months |
Common Mistakes to Avoid
- Skipping the breaker. Flipping the wall switch isn’t enough. A timer or automation system can still send power to the motor.
- Forcing the motor assembly. If it won’t slide back, you’ve likely missed a bolt. Yanking it cracks the seal plate.
- Using metal tools too aggressively. Gouging the vanes with a screwdriver damages the impeller. A wire and a brush do the job without scarring the plastic.
- Reusing a flattened O-ring. If it looks squashed or cracked, replace it. A bad seal pulls air into the system and kills your prime.
- Forgetting to reopen the valves. Run a dry pump with closed valves and you’ll burn out the seal in minutes.
Safety and Warnings
The biggest hazard here is electrical, not chemical. Always cut power at the breaker before opening the pump, and confirm the motor is fully stopped before your hands go anywhere near the impeller. If your pump is on a timer or smart controller, disable the schedule so it can’t restart mid-job.
Wear work gloves. The debris packed into an impeller often hides sharp bits, cracked plastic edges, and the occasional shard of glass that got vacuumed up. There are no fumes or harsh cleaners involved in this job, so ventilation isn’t a concern, just physical care around moving parts and sharp edges.
One more thing: if you smell a burnt odor from the motor or see scorched wiring while you’re in there, stop and call an electrician. That’s beyond a cleaning fix, and running a pump with damaged wiring is a fire risk.
How to Keep Your Impeller Clog-Free
Cleaning the impeller once is easy. Not having to do it every month is the real win.
- Empty the strainer basket weekly. This is your first line of defense. A clean basket catches debris before it ever reaches the impeller.
- Check the basket for cracks each month. A split basket is a highway straight to the impeller.
- Skim the surface before debris sinks. Floating leaves that get pulled into the skimmer are easier to catch than sunken sludge.
- Watch your flow rate. A drop in return pressure is your early warning that something’s clogging up. Catch it before flow stops completely.
- Trim back overhanging plants. Less foliage over the water means less debris in your system, especially in fall.
- Do a full impeller check seasonally. Spring startup and fall leaf-drop are the two times clogs spike. A quick inspection at each keeps small buildups from becoming full blockages.
Set a reminder for a flow check every couple of weeks. Staying ahead of the debris is far less work than tearing the pump apart after it quits.
Frequently Asked Questions
How do I know if my pool pump impeller is clogged?
The clearest sign is weak return flow while the motor still runs normally. You might also notice the pump losing prime, air bubbles in the strainer housing, or a higher-pitched motor sound as it strains against reduced flow. If your filter is clean and water still barely moves, the impeller is the prime suspect.
Can I clean the impeller without removing the motor?
Sometimes. Many pumps let you reach the impeller eye right through the strainer basket opening with a wire and brush. If the clog is deep or you can’t clear it from the front, you’ll need to pull the motor assembly back to access it fully. Check your pump model first.
What causes a pool pump impeller to clog?
Hair, stringy debris, small twigs, pebbles, and leaf matter that slip past a cracked or overfilled strainer basket. Fine sand and dirt can pack into the vanes too. Most clogs trace back to a basket that wasn’t emptied often enough or one with a crack letting debris through.
Will a clogged impeller damage my pump?
Over time, yes. A restricted impeller makes the motor work harder, which shortens its life and can overheat the seal. Reduced flow also strains your filter and heater. Clearing a clog early prevents a much pricier repair down the line.
How often should I clean the pool pump impeller?
For most pools, a full impeller check twice a year covers it, once at spring startup and once during fall leaf season. If you have heavy tree cover or notice flow dropping, check it more often. Weekly basket cleaning cuts how often the impeller itself needs attention.
Do I need special tools to clean the impeller?
No, nothing fancy. A screwdriver, a piece of stiff wire, a small brush, and a garden hose handle the job. Silicone lubricant for the O-ring and a spare O-ring on the shelf round out your kit. Skip the pressure washer, it can crack the vanes.
Final Word
A stalled impeller looks like a big problem and turns out to be a quick fix once you know where to look. Keep that basket empty, watch your flow, and you’ll rarely have to open the housing at all.
