
The first time a homeowner called me about a smoky room, she swore she’d cleaned her chimney — she’d swept the flue right down to the top of her fireplace and stopped there, never touching the insert itself. The problem was the gap she couldn’t see: the space between her insert and the old masonry flue was packed with soot, and without a liner, half the exhaust was curling back into her living room. That one blind spot is the single most common reason inserts get “cleaned” and still don’t draft right.
An insert changes the whole job because you’re no longer sweeping one open chimney — you’re dealing with a sealed metal firebox, a liner (or the lack of one), and a baffle system that traps buildup where a standard brush never reaches. Learning how to clean a chimney with an insert means treating those three zones as one connected system instead of scrubbing the parts you can see and hoping for the best.
What You’ll Need
Gather all of this before you pull the insert apart, because once soot starts falling you don’t want to be walking through the house hunting for a tool:
- A chimney brush sized to your liner (commonly 6″)
- Flexible fiberglass rods or a rotary drill-cleaning kit
- A wire brush and a stiff hand brush for the firebox
- A shop vac with a fine-dust or HEPA filter
- A drop cloth or plastic sheeting
- Painter’s tape and a marker
- A flashlight or headlamp
- Screwdrivers and a socket set (for baffle and surround removal)
- A dust mask (N95 or better)
- Safety glasses
- Heavy work gloves
- A metal ash bucket with a lid
- A creosote-buildup gauge or just a putty knife to test hardness
Let the Insert Go Fully Cold First
Wait at least 24 hours after your last fire. Cast iron and steel inserts hold heat deep in the body long after the flames die, and the liner above stays warm even longer. Working on a warm insert is how people end up with scorched forearms and soot baked onto tools.
Spread your drop cloth across the hearth and out onto the floor a good three feet. Soot from a liner falls in a rush once you start brushing, and it drifts far — cover more than you think you need.
Remove the Baffle and Surround Panels

Most inserts have a metal surround plate framing the front and a baffle (sometimes called a throat plate) sitting inside the top of the firebox. Take a photo of each before you loosen anything, then tape a labeled note on every panel so it goes back exactly where it came from.
Clients used to ask me why their stove “smoked more after cleaning,” and nine times out of ten the baffle went back crooked or upside down. That plate directs exhaust up into the liner — set it wrong and you choke the draft. Mark it now.
Lift the baffle out carefully. It’s usually heavier than it looks, and firebrick or ceramic versions crack if you drop them.
Brush the Liner From the Top Down
If your insert connects to a stainless liner (and it should), climb to the roof safely or work from the top of an accessible flue. Feed the brush down, adding rods as you go, and work it up and down the full length of the liner in short strokes.
Most insert liners are 6-inch flexible stainless, so use a poly brush rather than a stiff wire one — a wire brush will scrape and thin the corrugated liner walls over time. Brush until the rod moves freely and you stop hearing that gritty drag of loose creosote coming off.
No Liner? Stop and Reassess
If your insert was slid into an old masonry flue with no liner, brushing alone won’t fix the real hazard. That oversized gap around the insert lets exhaust cool, slow, and deposit creosote fast — and it’s a carbon monoxide risk. Clean what you can, then call a pro about lining it. This is not a corner to cut.
Scrub the Firebox and Baffle
Back at the firebox, use your wire brush and hand brush to knock soot and light creosote off the interior walls, the top plate area, and the removed baffle. Get into the corners where buildup cakes hardest.
Don’t scrub the door gasket or glass with the wire brush — you’ll shred the rope seal and scratch the ceramic glass. A damp cloth handles the glass; the gasket only needs a gentle wipe.
Vacuum Every Zone
Run the shop vac through the firebox, into the connector between insert and liner, and across the hearth. Vacuum the baffle and surround panels before reinstalling them so you’re not putting soot back into a clean box.
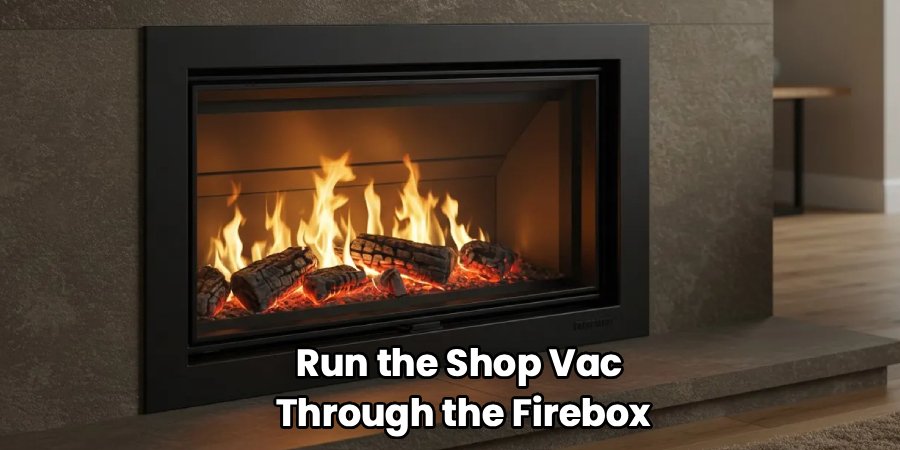
Hit the connector pipe and any elbow especially hard. Soot packs down at bends, and a clogged connector chokes airflow just as badly as a dirty liner.
Reassemble, Seal, and Test the Draft
Put the baffle back first, using your photos to seat it in the right orientation. Reinstall the surround panels, check that the door gasket still seals evenly, and confirm every connection sits tight.
Build a small, hot test fire and watch the smoke. It should pull straight up and out with no spillage into the room. If smoke curls back toward you, shut it down and recheck the baffle position and the connector seal before you trust it for a full evening burn.
Poly Brush vs. Wire Brush and Other Judgment Calls
An insert has a mix of surfaces — corrugated liner, cast firebox, ceramic glass, rope gasket — and each one wants a different touch. Using the wrong tool on the wrong zone is where people quietly damage their setup.
| Task | Do This | Avoid This | Why It Matters |
| Brushing a stainless liner | Poly/nylon brush sized to the liner | Stiff wire brush | Wire thins and scores the corrugated liner |
| Firebox interior | Wire brush for baked-on soot | Harsh chemical strippers | Chemicals leave residue that burns and smells |
| Ceramic glass | Damp cloth or wood-ash paste | Abrasive pads or wire brush | Scratches the glass permanently |
| Door gasket | Gentle wipe only | Scrubbing or soaking | Frays the rope seal and breaks the airtight fit |
| Removing soot | Shop vac with fine/HEPA filter | Household vacuum | Fine soot blows through standard filters |
| Testing creosote | Putty knife scratch test | Guessing by color alone | Hard glazed creosote needs a pro, not a brush |
| Frequency | Clean yearly, mid-season if heavy use | Waiting for smoke problems | Buildup hardens into glaze you can’t brush off |
Match the tool to the surface and you’ll clean the whole system without wearing out the parts you’re trying to protect.
Common Mistakes to Avoid
These are the errors that turn a solid cleaning into a smoky room or a damaged insert:
- Cleaning only the flue above the insert. The connector, firebox, and baffle collect the worst buildup — skipping them leaves the real problem in place.
- Ignoring a missing liner. An unlined insert in an oversized masonry flue is a genuine safety issue, not a maintenance shortcut.
- Reinstalling the baffle wrong. Backwards or crooked, it wrecks the draft and pushes smoke into the room.
- Using a wire brush on the liner. It scratches and thins stainless over time, shortening its life.
- Using a household vacuum. Fine soot passes right through the filter and hangs in your air for hours.
- Scrubbing the door gasket. A frayed rope seal breaks the insert’s airtight burn and hurts efficiency.
Safety and Warnings
You’re working with fine airborne soot, potential carbon monoxide, and creosote that ranges from soft dust to a hard, flammable glaze. Take these seriously.
Let the insert go stone cold. Give it a full 24 hours. Cast iron holds heat far longer than it looks.
Wear a mask and eye protection. Soot and creosote dust are fine, easy to inhale, and irritating to your eyes. An N95 (or better) and safety glasses are not optional.
Never work on a roof alone or in bad weather. If top-down liner access means climbing, use proper fall protection, dry footing, and a spotter — or hire out that part.
Watch for glazed creosote. If your scratch test hits a hard, shiny, tar-like layer that won’t brush off, stop. Glazed creosote is highly flammable and needs a certified sweep with the right tools. Don’t burn the insert until it’s removed.
Guard against carbon monoxide. A poor draft — from a missing liner, a wrong-facing baffle, or a clogged connector — can push CO into your home. Keep a working CO detector near the insert and test it before your first fire of the season.
Handle ash and soot as if it’s live. Embers can hide in ash for days. Empty everything into a metal bucket with a lid, kept outside and away from anything flammable — never into a plastic bin.
Know when to call a pro. Glazed creosote, a missing or damaged liner, a cracked baffle, or persistent smoking after a full cleaning all mean it’s time for a certified chimney sweep. An annual professional inspection is worth it even if you do the cleaning yourself.
Maintenance and Prevention Tips
A little routine care keeps the liner clear and makes your yearly cleaning fast instead of grueling:
- Burn only seasoned, dry hardwood. Wet or green wood is the number one cause of fast creosote buildup — split it and let it dry six months to a year.
- Run hot, bright fires, not slow smolders. Choking a fire down for a long, low burn cools the exhaust and coats the liner with creosote.
- Wipe the glass every week or two during the season. A dab of damp wood ash on a cloth cuts soot film without scratching.
- Check the door gasket each fall. A flat or frayed rope seal lets air leak and burns dirtier — replace it when it stops springing back.
- Empty the firebox ash regularly. Ash left sitting works its way into the connector and liner.
- Book a professional inspection once a year. A sweep spots liner wear and glazing you can’t see from either end.
One timing note that saves a lot of grief: schedule your cleaning in late summer or early fall, before the first cold night. Everyone waits until they light that first fire and get a face full of smoke — and by then every sweep in the county is booked out two or three weeks. Do it early and you skip the waitlist entirely.
Frequently Asked Questions
How often should you clean a chimney with an insert?
At least once a year, ideally before burning season starts. If you burn frequently through winter or use less-than-perfectly-seasoned wood, add a mid-season check. Buildup that sits too long hardens into glaze that a brush can’t touch.
Can you clean a chimney insert yourself?
Yes, if you’re comfortable removing the baffle and surround, brushing the liner, and reassembling everything airtight. You need the right-sized poly brush, a fine-dust shop vac, and safe roof access if you’re cleaning top-down. If you find glazed creosote or a missing liner, that’s your cue to call a pro.
Do you have to remove the insert to clean the chimney?
Usually not for a routine cleaning. You remove the baffle and surround panels to reach the connector and liner, but the insert itself typically stays put. Full insert removal is only needed for major repairs, liner replacement, or if the connector can’t be reached any other way.
How do you clean the chimney if the insert has no liner?
You can brush and vacuum what’s accessible, but an unlined insert in an oversized masonry flue is a safety problem, not just a cleaning one. The gap lets exhaust cool and deposit creosote fast and raises carbon monoxide risk. Have a certified sweep install a properly sized stainless liner.
What’s the difference between soot and creosote in an insert?
Soot is the soft, powdery black residue that brushes and vacuums out easily. Creosote is the harder, sometimes shiny buildup that forms when fires burn too cool or the wood is damp — glazed creosote is tar-like, highly flammable, and needs professional removal.
Why does my insert smoke after I’ve cleaned it?
The most common cause is the baffle going back crooked or backwards, which disrupts the draft. Check that first. A loose connector, a leftover clog in an elbow, or a damaged door gasket can cause it too — and if none of those fix it, have a technician check the draft.
Final Word
Treat the insert, connector, and liner as one connected system — clean all three, seat that baffle exactly as it came out, and test the draft with a small fire before you trust it for the evening. Do it in early fall while the weather’s still mild, and you’ll dodge both the mid-winter smoke-back and the long wait for a sweep.
